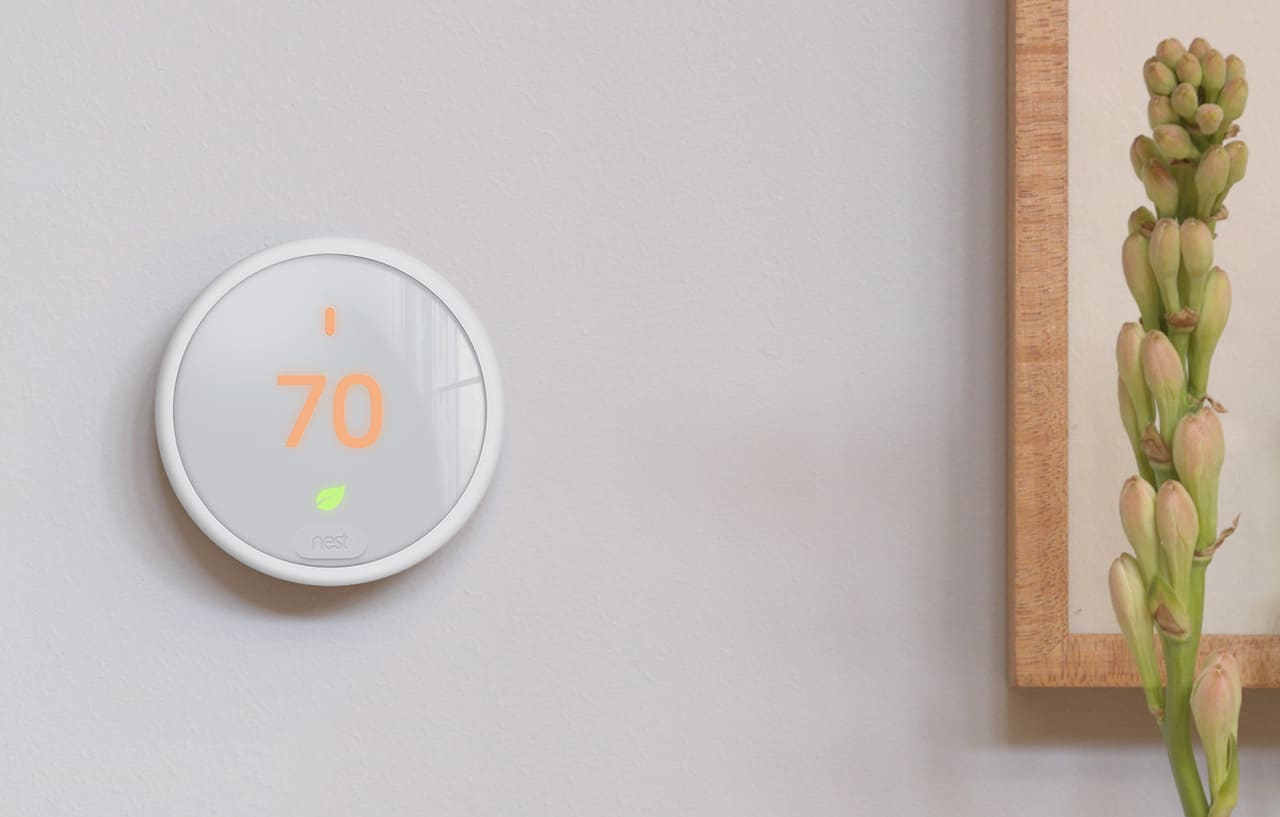
The nest thermostat blinking red signifies that the battery of the thermostat is very low. The battery needs to be fully charged to use it further. Here, blinking defines the battery that is charging, and ultimately it will turn on. You have to be very diligent while the battery gets charged.
If your nest thermostat is blinking red and not turning on, it simply means that the battery charge is very low. Allow your Nest thermostat to charge for an hour. This won’t take long but let it charge completely. Check the thermostat wiring to see whether it is done properly or not. If still, the red light is blinking, you can install a new C wire, restart or reset the thermostat.
If you want to have in-depth knowledge on how to resolve this problem, keep on reading. We will discuss all the possibilities that you can do to fix the error.
What does a blinking red light on my nest thermostat mean?
The google Nest thermostat blinking red depicts that the battery is low and it is charging. Once it is completely charged it will automatically turn on. You are not required to turn it on. Sometimes even after charging, the Nest thermostat keeps blinking red. In such a situation you have to be patient enough to let the battery charge for at least an hour.
The below table is to make you understand the meaning of different lights in thermostat
| Red light | Thermostat battery is low |
| Green light | Thermostat is updating |
| Orange light | Thermostat is charging |
| White light | Thermostat reconnecting with router |
How to fix the Nest thermostat flashing red light?
If your nest thermostat is blinking red, then you should charge your thermostat with a USB cable until it’s fully charged. Sometimes, the Nest thermostat gets damaged, and you need to verify whether it is damaged. Check the wiring properly, restart the thermostat, and check if it’s getting the required power from the input source.
Fix 1: Check your Nest thermostat battery

Your battery’s 3.6 V operating voltage is the absolute minimum. Your thermostat stops working if it drops below this level. It becomes unusable for you. You have to add a common wire to it. You are not required to replace the batter as it can consume a lot of time. You can add a wire which is very quick.
How to check the Nest thermostat battery?
- Click on settings
- Click on the technical information option
- Select power menu
It will then show all the details about the battery voltage and power parameters of your nest thermostat. Additionally, it’s a good idea to look at the Lin voltage while scrolling down in the power menu. Certainly, it will mean that you are required to add a common wire if it is 20 or less.
How to charge the nest thermostat battery?
You need to replace the old battery with the new one.
- Take the thermostat display’s base off.
- Remove the old batteries from the thermostat
- Swap out the two used AAA alkaline batteries for the two new ones.
- Ensure that the “+” and “-” marks on the battery ends match the markings on the charging port.
- Slide the thermostat screen back onto the frame once it has snapped into the position.
Fix 2: Check if the Nest thermostat won’t charge

More often, the Nest thermostat blinking red when charging implies that the battery is too low but its charging. Once the battery is charged completely, it will turn on. You need to wait until then. If your battery is completely drained it will take much longer. Usually 2 hours to completely charge.
Restart the nest thermostat:
Restarting any device is the most common solution to resolve such a technical issue.
Charge your nest thermostat manually:
Even after restarting, the problem doesn’t get fixed, try to charge it manually with a USB cable. Remove the display and connect your USB with a computer. Once it is recharged, remove the USB and insert the display back onto the base.
Ensure wires are connected systematically:
The battery in your Nest thermostat is charged using power from your HVAC system. And the wires attached to the base of your thermostat are used to transmit this power. Therefore, it is likely that your thermostat won’t receive enough power to charge the internal battery if the wires are loose, damaged, burned, or otherwise problematic.
Reset the thermostat:
Factory reset is the last step you can do to charge your thermostat.
Fix 3: Check your thermostat wiring
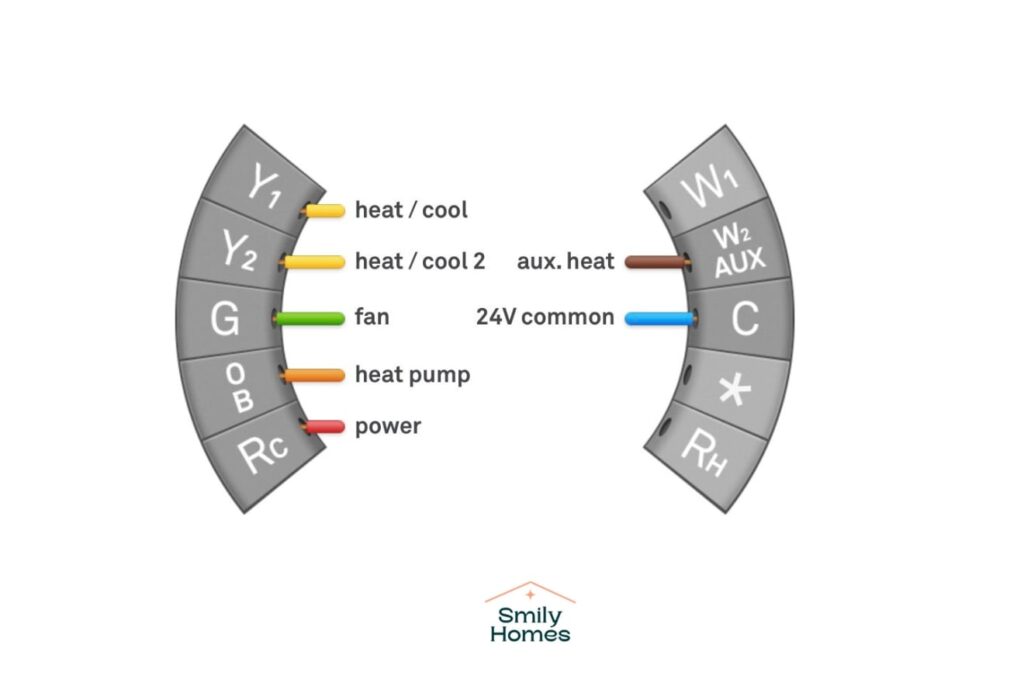
To check whether your Nest thermostat is compatible or not, you need to review your thermostat wiring first. It might be possible that your wire is connected to the wrong thermostat connector. In such cases you need to check the system’s control board to identify the wires that are connected with your thermostat.
If your Nest learning thermostat blinking red even after charging, you should check your thermostat’s wiring by following steps:
- Click settings on the Qucik view tab
- Click on Equipment. You will find the wires that are detected
- Press Continue
- Test the system components you want to
- The thermostat will help you to identify the test
Fix 4: No power to the R wire
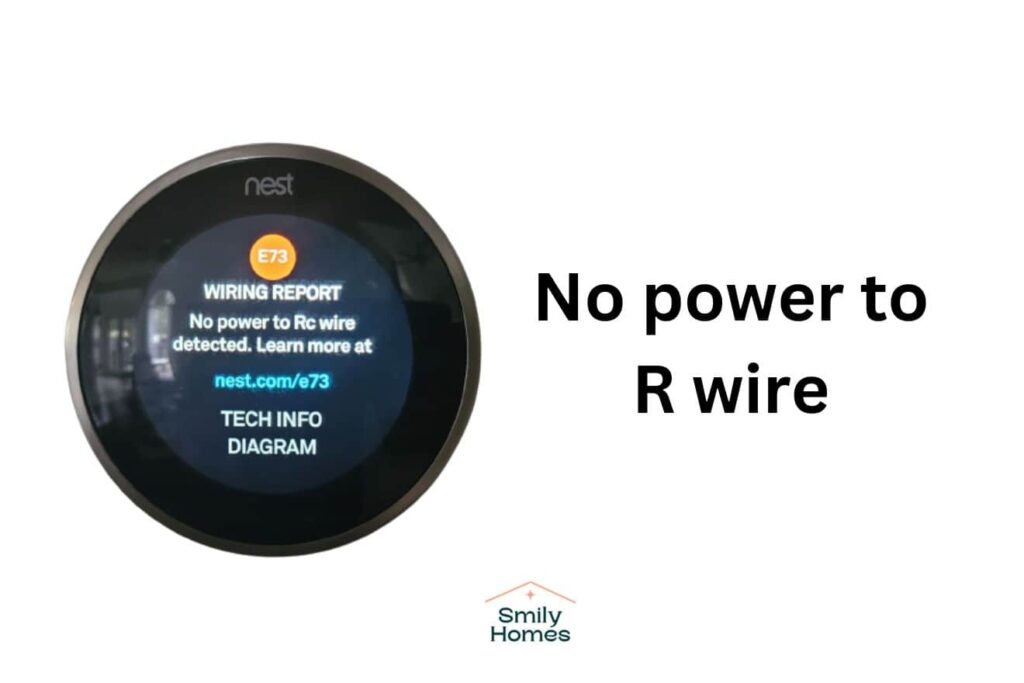
The entire HVAC system in your home is powered by the R-wire. It is important to check if the wire is connected securely. Therefore, if there is a problem with your R-wire, your heating and cooling system won’t work or could even be damaged. You need to be very careful with that.
- Check system power is switched on.
- Check your R-wire to see whether it’s unraveled.
- Verify your thermostat wiring
- Check your float switch was tripped
- Check Condensate Drain Line
- Contact support
Fix 5: Reset your Nest thermostat

Reset is the best option when your Nest thermostat blinks red and won’t turn on. There might be any software issue because of which your issue is not resolved. So, resetting will help in restarting the software and updating it. There is a quick and easy way to reset the thermostat.
How to reset the thermostat?
- Go to the primary menu
- Click settings
- Select ‘Reset’ option
- It will navigate you to Factory Reset.
- Click on the factory Reset and all your data will be lost
- Set up once again in the same way you did when you first installed it
Fix 6: Check Air Filter Clog Issue
Your HVAC system must maintain proper airflow in order to operate, and a clogged air filter can significantly reduce the amount of air passing through the cooling coils, which can cause the system to freeze and shut down. This is a very common issue that occurs several times. To check Air Filter Clog issue, you need to follow the steps:
- Find the system’s air filter, which might be hidden behind a grate along the ceiling.
- Sometimes, the air filter is located inside the furnace, you need to shut off the power at the breaker.
- Replace the filter if it’s dirty
- If frozen cooling coils are the issue, let them defrost first before using.
Fix 7: Contact the support team
If the above discussed measures won’t solve your problems, there is always a support team to guide you. Contact the support team in case of any queries. The team is available 24/7.
The contact details are mentioned below:
- Google nest support
- Nest Toll-Free Number: 855-469-6378
Conclusion
Nest thermostat will turn on once it is completely charged. But if it doesn’t then you can check the battery or charge the battery. Sometimes, Air filter clog issues also arise, you can review that. Reset it if nothing works. Still, it is not resolved then the contact team is always available to help you.
Frequently Asked Questions(FAQ’s)
What does green light on Nest mean?
The green light on Nest Thermostat means that the software is installing or the thermostat is restarting. If the Nest thermostat blinking red and green then the thermostat is frozen because of any software update.
What does White light on a Nest mean?
White light signifies the thermostat is reconnecting with the router.
How do I know if my nest thermostat is charging?
A blinking light will confirm the charging of Nest thermostat.
How long does the Nest thermostat battery last?
It can lasts for 5-10 years


