
Is your peloton bike or bike+ won’t turn on? Loose power cables, USB cords, damaged wall sockets, etc can stop your peloton bike from properly functioning.
Inspecting and correcting the power sources easily solves the Peloton bikés Turn-on problem. However, a few additional changes are also required sometimes. For example, power cycling, optimizing the touch screen cords, and others. This guide explains why Peloton Won’t Turn On and provides solutions in detail.
So when your Peloton Won’t Turn On, inspect the following things:
- Check the power adapter cable located behind the bike,
- Ensure solid fit of the USB-C connection to the bike frame, display screen, and brake shroud
- Know standard voltages for accurate power requirements
Peloton Bike Won’t Turn on – Troubleshooting Guide?

Poor power connection mainly caused turn-on problems in the peloton bikes. Adjusting the cables and ensuring the power requirements are enough to resolve the problem. A peloton bike has many cables and power bricks around the body. Adjust each connection step by step by following our guide.
Fix 1: Check The Power Connections
Peloton bikes run on electricity which is delivered through cables. Incorrect or loose wires can abstract the source and cause turn-on problems in these exercise machines. Below are certain inspections and corrections you should follow to start the peloton bike.
Here are the connections that you must check.
Fix peloton power cord
First, ensure the peloton bike has strong power sources. It means there are no unplugged or loose cables in that machine. These bikes come with small electric bricks that connect to the main cable. So
- Check the brick is correctly plugged into the wire from one end
- Ensure the other end is firmly attached to the wall
If there is nothing wrong with the power connection, a green flash display on the brick.
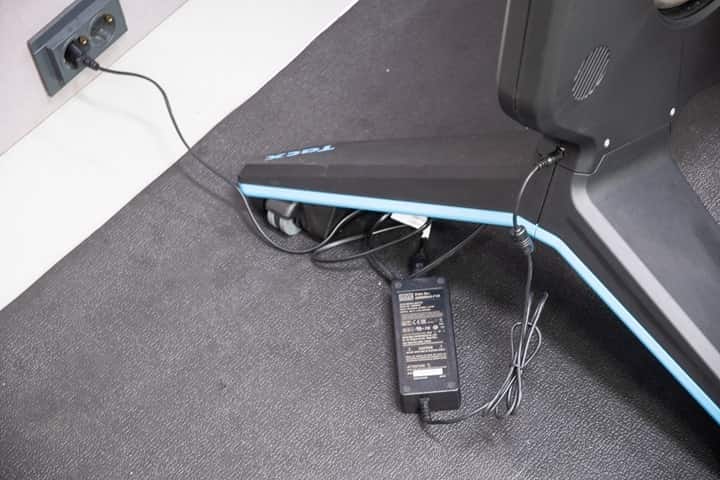
Power adapter at the base of the bike
Connected power adapter is important for your Peloton bike or bike +. This connection is available at the bottom of the machine. Lose or damage to the wires can cause create issues in the peloton bike.
- First pull off the wire form adapter
- And insert the cable firmly
If you have a bike +, a tiny white light will flash at the bottom. Peloton bike users should manually check if it’s working properly.
Connection up under the resistance mechanism

The third step is to check the resistance mechanism under the machine. The Peloton bike has dual attachments on the left side under mechanism and bike + has a single connection on the right side. Heavy use or transportation may lose the cable under this space. So follow the steps to ensure proper power requirements
- Grab a torch or use a smartphone flash to see under resistance mechanism
- Ensure the cable is securely plugged there
Peloton bike+ tends to lose this connection more, while peloton bikes have assured protection of avoiding such issues.
Back of the display panel
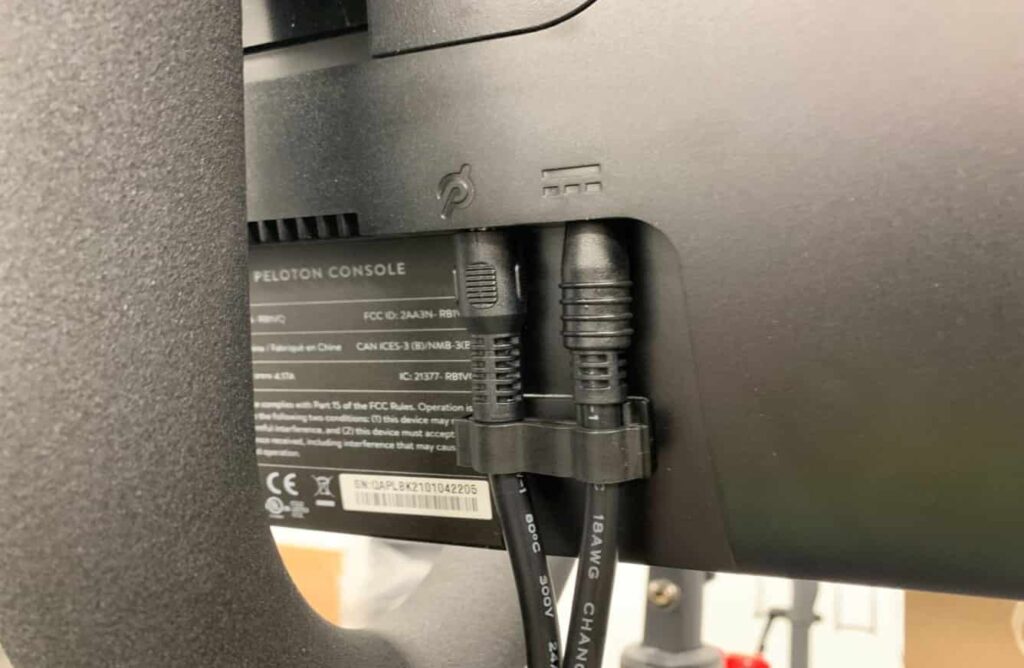
Your Peloton bike or bike+ display Won’t Turn On if the back panel wires are unplugged. Ensure the cables are attached accurately in the right place.
- Peloton bike’s display panel has two connections: audio cable on left side and a power cable on the right side
- Peloton bike+’s power cable is attached to the mid-portion, and the audio side is located on the top
- Simply pull and plug the wires firmly if they are loose
- Now you can quickly turn on the display
Avoid playing with your kids near the back panel; their childish nature can unplug or damage the wires.
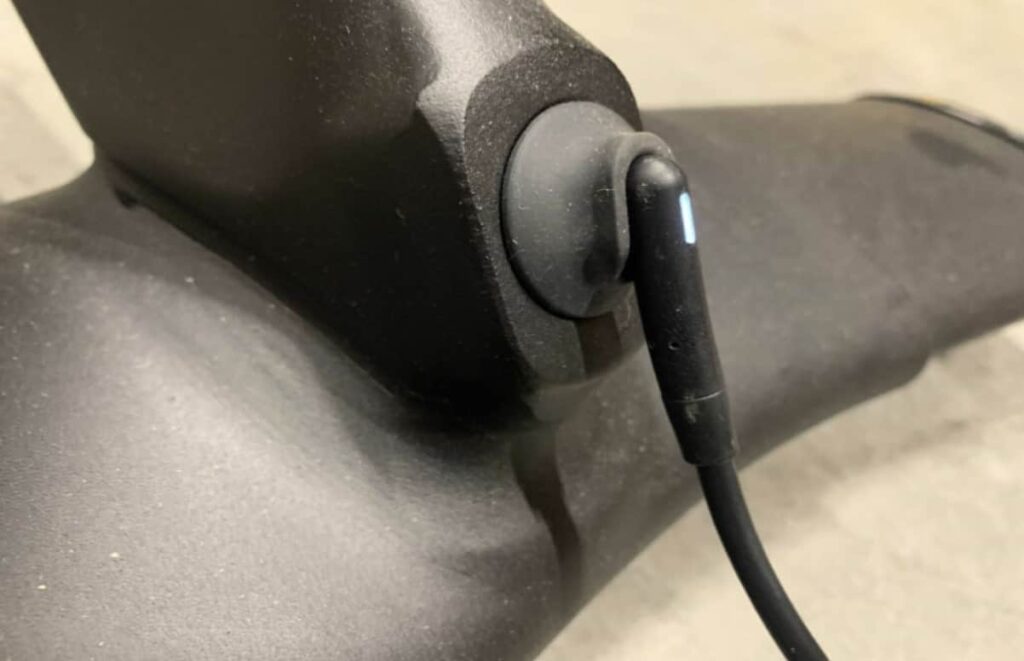
Above the brake shroud (Bike+ Only)
“only applicable for peloton bike+ owners.”
Near the bike+ brake shroud, a USB cord is attached. This wire is available just above the break shroud (near the resistance mechanism). For better understanding, check the outside front of the wheel.
- Ensure the cord is attached to the port
- Slightly push the wire and fix the connection
This cord occasionally comes unplugged, which makes Peloton Won’t Turn On.
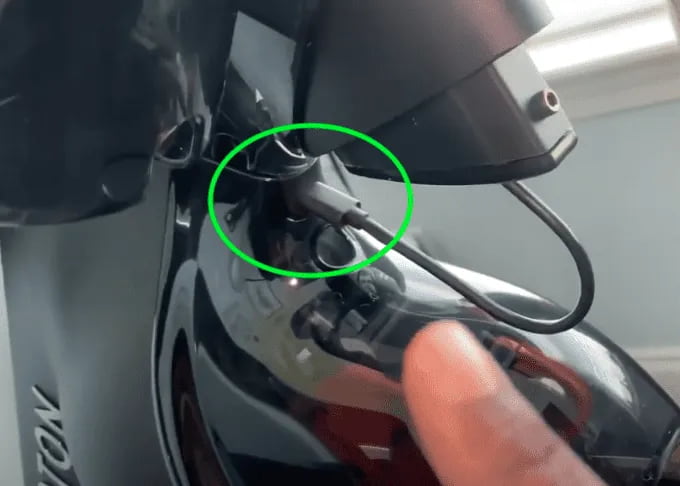
Check the USB-C connection inside the frame & touchscreen
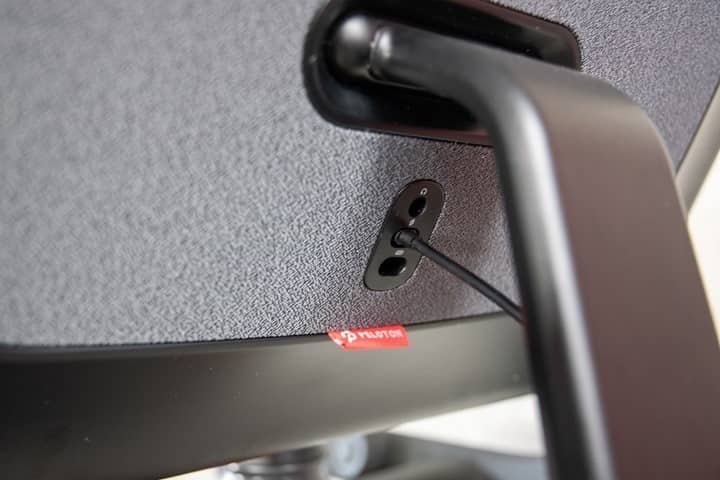
There is another crucial connection available near the peloton logo. You can see a USB-C cable inside the frame.
- If you notice the connection is unplugged
- Push the cord gently
Fix 2: Check the power requirements

Peloton bike or bike+ has specific power requirements to run without trouble. Ensure the supplies are properly delivered from your electric outlet. Peloton official says, voltage requirements are: 100V to 240V, 50Hz to 60Hz, 3.25 A Max
- A peloton bike runs on 50 watt electricity
- Use a power outlet that provide a common 120 watt voltage
- The bike will take a maximum of 3.25 amps
Ensure the power brick is capable of meeting the power requirements.
Fix 3: Power cycle your peloton bike

This is a simple turn-off and turn-on step to resolve your problem. Sometimes, an electronic device needs a soft restart to eliminate internal glitches and restore power. It is normal for these machines due to long-term use. So below are the steps to power cycle your peloton bike.
- First, disconnect the power cables at the bottom of the peloton bike and the walls
- Wait for 30 seconds before reconnecting the cords again
- Ensure the green light is present on the power adapter; if there is no flash, contact support team
And
- For bike+ owners, leave the power cables and wait until the white light disappears
- Reconnect the cords again in the same format and ensure the bike+ performs regularly
Fix 4: Check the sensor light

Peloton bikes or bike+ have many advanced features for user convenience. Sensor lights are one of them to ensure different stages in your machine. Sometimes, your bike takes time to turn on and start flashing the sensor light. In most cases, users start worrying. For examples,
- A flashing milky light ensures your bike is turning on coming out of a sleep stage. This is a normal stage that mainly occurs after a manual software update.
- A flashing red light indicates there is a hardware or software issue.
- A yellow flashing may not signal an error, but it takes a while to become normal. Sometimes you may need to power cycle the bike.
So after plugging in, wait for seconds to turn this machine on. Monitor the sensor lights to understand the present status.
Fix 5: Check the peloton screen

Peloton touch screen monitor, adjust and guide your exercise to boost performance. Irregular connections in this space lead to the peloton won’t turn on. So it is important to keep the power supply checked at the touch screen. Below are the steps to follow
- Go behind the back panel of the screen
- Ensure the middle port cord is properly plugged
- Apply light pressure and adjust the connection gently
Fix 6: Check the cable condition
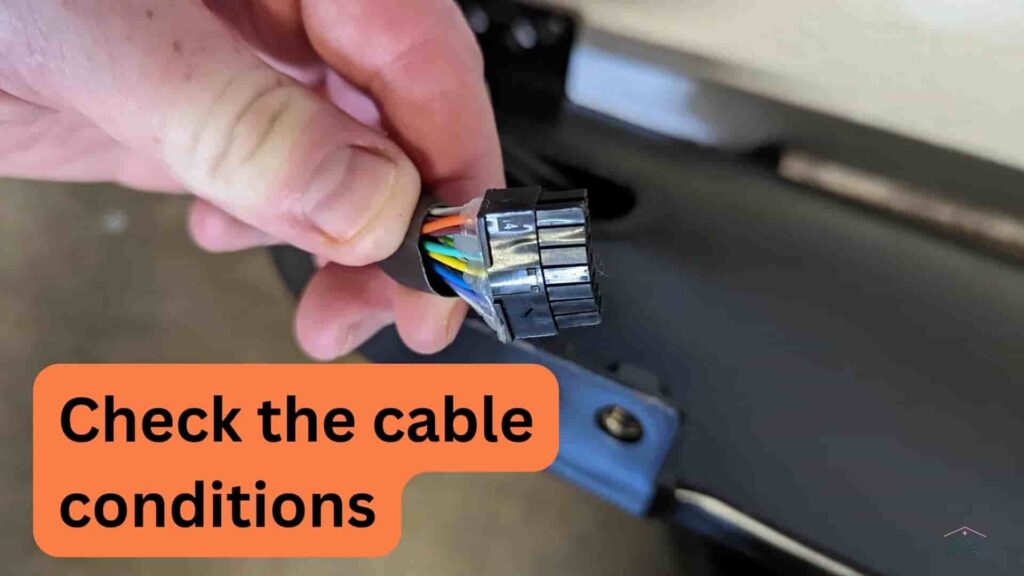
Till now, we have discussed various cables located around the peloton bikes. So you get an idea that any damage to these cables can restrict the power requirements. Individual inspection for wires is essential to turn on your peloton without hustle.
- Take a torch or grab a smartphone light
- Inspect different wires if they are damaged or not working properly
Fix 7: troubleshooter peloton screen

Power to the bike’s touchscreen is essential to run the machine properly. Sometimes, a few incomplete attachments can restrict the electric supply of these bikes. If you see errors in the display, it is obvious to face turn-on issues in a peloton. So below are the steps to resolve the problem
- First, unplug the power cable located at the bottom of the machine
- Go behind the display panel and unplug the power cable from the middle port
- Now insert the wires in the right ports and turn on the screen
- If still the display won’t turn on and pop up an error, contact the support team
Peloton screen not turning on – What should I do?
The could be multiple reasons why your peloton won’t turn on. The most common reason could be the power source. Maybe, your peloton treadmill isn’t getting enough power to start.
As we discussed in this blog, on how to turn on the peloton treadmill, the same thing can be applied to turn on the peloton screen.
- Fix all the power connections associated with the peloton bike
- Cross-check the power requirements
- Powercycle the peloton bike
- Cross-check the sensor lights
- Check the peloton screen power connections
How To Turn On The Peloton Screen?
While everything is done, all connections are checked twice, now it’s time to start the bike.
- For that go to the backside of the display panel.
- On top and middle of the board, you get a grey power button.
- Press and hold the switch for 5 seconds.
- The display will light up and start to proceed next.
Now you are ready to start working out on the bike.
How to calibrate Peloton bike?
Before calibrating the peloton bike make sure the display screen works properly.
After the confirmation, start the bike screen.
- Open the display and go to bike “home screen”.
- At the bottom you find three dots, tap it.
- A new menu will pop up.
- Find the about section and tap.
- You see the details of your bike hardware.
- Tap multiple times at top corner of the screen.
- Sensor collaboration screen will open.
- Tap and start the process.
- A message pop up, let it pass.
- Now you get the option “calibrate”, press here.
- Your screen guide you to turn the resistance knob.
- After That tap the red calibrate button on the screen.
From this point your screen will guide you to minimize or maximize the resistance through the calibration process. So follow instructions step by step to calibrate the peloton bike.
How to Factory reset the Peloton Bike?
Factory reset only be done when necessary.
Factory reset will remove the system’s log in, setting, membership, and other crucial data.
So follow the reset if you want to sell the bike due to trouble in-display access, setting menu etc.
Below are the step by step guide about how to Factory reset the peloton bike.
- Hold the power button for a few seconds.
- Select shutdown.
- Now your screen display will be “power off”.
- Hold volume up and power button together until the Peloton logo appear.
- Now bring back your fingers because the display goes in “recovery mode”.
- A screen appeared with the option “wipe [all user] data/factory reset”.
- Use the volume button to reach the option.
- Now use the power button to select.
- Confirm again by selecting “Yes”.
- Now all users data deleted.
- Lastly, select “reboot system now”.
How to connect the Peloton bike with wifi or ethernet?
This is a fantastic feature of a peloton bike.
You can connect the display screen with wifi or ethernet. That’s how you can enjoy youtube, and other online platforms during your paddling.
Connect peloton bike with wifi
- Open the touchscreen display of your bike
- Go to home screen
- Find advanced setting and tap
- Select your wifi network
- Enter the password
- Wait for a second to connect
Connect peloton bike with ethernet
- Bring an ethernet cable
- Go to the backside of your display panel
- Find the ethernet port to plug-in
- Wait for a while, the display will automatically connect
Conclusion
So this is the complete guide to why your peloton bike and bike+ won’t turn on. As mentioned, poor connection, damaged wires, and internal glitches mainly cause the problem. You can quickly bring life to your device by following our troubleshooting steps. There is no complex adjustment required to resolve the problem. \
But you must understand the power requirements and connectivity to run peloton bikes properly. So this is the troubleshooting guide for your question.
Note: If you love to talk about home decor ideas, become a contributor.


