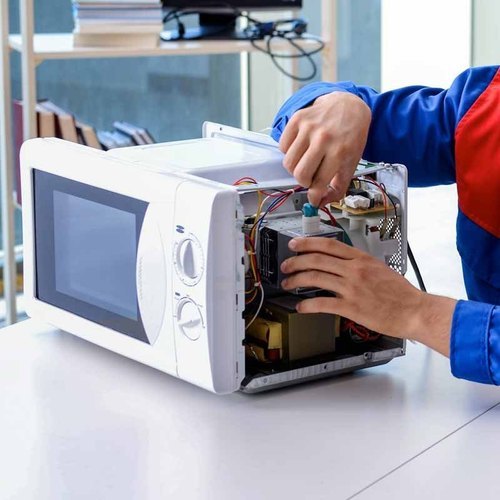
If you’re similar to the majority of individuals, you probably anticipate having to shell out money for a professional repair service when one of your household appliances malfunctions.
It’s quite inconvenient to be without an oven for an extended period, and most of us lack the expertise to pinpoint the issue. However, astonishingly, many common appliance breakdowns are straightforward to identify and resolve. Armed with little more than an affordable multimeter and some nut drivers, you have the capability to handle numerous repairs on your own including ovens repair, leading to substantial cost savings.
In the following discourse, we’ll guide you through the process of identifying and rectifying typical issues that may arise with ovens in your household.
A lot of companies offer oven repair services. However, the components necessary for these repairs, none of which should consume more than a few hours of your time, come at reasonable prices.
To procure the required parts, you will need to obtain the appliance’s model number and serial number. You can typically locate this information on a tag positioned behind the door or bottom drawer of ovens.
When it comes to finding the parts, you can peruse the Yellow Pages under “Appliance Parts,” explore online parts services, or get in touch with the manufacturer directly.
Gas oven won’t heat
Troubleshooting Steps to Resolve Gas Oven Heating Issues:
Check Power Supply: Begin with the basics. Confirm that your gas oven is properly plugged in and receiving power. If the oven’s light isn’t turning on, inspect the receptacle for power. Surprisingly, sometimes the issue is as simple as plugging the oven back in or resetting a tripped circuit breaker. Keep in mind that even for such minor interventions, some oven repair Boston professionals might charge for a service call.
Clock Setting: For older ovens equipped with a mechanical clock rather than a digital one, double-check the clock settings. Ensure that you haven’t accidentally bumped it off the manual setting, which could prevent the oven from operating as expected. Adjust it as needed to ensure the correct settings.
Lighting Mechanism: If the above solutions don’t resolve the problem, focus on the oven’s lighting mechanisms. Ensure that the pilot light or ignition system is functioning correctly. Ignition problems are a common cause of gas ovens failing to heat up. If you’re not comfortable working with gas-related components, it’s advisable to seek oven repair Boston professionals.
By systematically addressing these potential issues, you can often diagnose and potentially resolve gas oven heating problems on your own before resorting to a oven repair services.
There are three distinct methods for igniting the burners in gas ovens:
Pilot Lights: Gas ovens equipped with pilot lights have a small, continuously burning flame (pilot light) responsible for igniting the burner. To identify a pilot light oven, inspect the burner assembly, typically visible through the broiler drawer opening. You’ll notice a gas tube with a “thermocouple” located near its tip. The thermocouple is a small cylinder with a thin copper tube leading to it. If your pilot light is extinguished, consult your stove’s manual for specific lighting instructions, or consider contacting your local gas company for assistance. Pilot light ovens are becoming less common, and we won’t delve into repairs for them here.
Spark Ignition: When you turn on your oven and hear a clicking sound, you likely have a spark ignition pilot assembly. It resembles a pencil-shaped porcelain tube with a metal tip at one end and a wire extending from the other end. Given its relatively uncommon nature, we won’t cover repairs for this type here.
Glow Coil Igniters: The most prevalent type of ignition system in modern ovens is the glow coil igniter, which closely resembles the ones depicted in Photo 2. You can locate it at the rear of the burner (as shown in Figure A and Photo 1). When you activate the oven, the igniter should emit a bright glow, indicating to the gas valve to open and subsequently igniting the burner.
If the igniter is faulty, it won’t initiate the gas valve, and your oven won’t start.
If the igniter fails to glow, glows dimly, or doesn’t light the burner after glowing for 30 to 45 seconds, it’s time to replace it (as demonstrated in Photos 1 and 2).
To commence the replacement process, start by removing the oven racks and lifting out the metal burner cover located at the oven compartment’s bottom. Then, proceed with the steps outlined in Photos 1 and 2. Although your oven’s appearance may vary slightly, the procedure remains consistent. This is also an opportune moment to clean the small holes in the burner using a stiff-bristle brush.
Handle the new igniter with care, and refrain from touching the dark gray element, as body oil contact can reduce its lifespan.
Electric oven won’t heat
Troubleshooting and Solutions for Repairing an Electric Oven That Won’t Heat:
Check Circuit Breaker: Before attempting any repairs, ensure that the circuit breaker (double pole for 240 volts) for your electric oven hasn’t tripped off. A switched-off circuit breaker can lead to a loss of power, preventing the oven from heating. If you find it’s tripped, reset it.
Test Voltage: If your oven only heats partially or the oven light still functions, but it doesn’t heat properly, use a voltage tester (available at home centers and hardware stores) capable of testing 240-volt circuits to check the oven’s receptacle. You should get a reading of at least 200 volts. If the voltage is lower or nonexistent, consider calling an electrician to address the electrical supply issue.
Inspect Heating Element Connections:
- Unplug the oven from the electrical outlet.
- Unscrew the heating element from the oven and gently pull the connections into the oven compartment (as shown in Photo 1).
- Carefully guide the wires through the holes to prevent disconnection or damage.
- To prevent wires from being pulled back into the hole, use a clothespin if they have tension on them. If a wire disappears into the hole, retrieve it by pulling out the stove and removing the back panel.
- Inspect the connections for signs of damage such as charring, fraying, or breakage.
- If the terminal connection is damaged, replace it with a special “high-temperature” terminal, which can be obtained from appliance parts dealers (as demonstrated in Photos 1 and 2).
Test the Heating Element:
If the connections appear to be in good condition, the heating element itself may be burnt out. You can test it with a multimeter (available at home centers and hardware stores) as shown in the bottom left photo. Alternatively, take the heating element to an appliance parts store for testing.
Install a New Heating Element:
- If the heating element is indeed faulty, installing a new one is a straightforward process.
- Connect the wires to the new element.
- Carefully slide the wires back into the holes.
- Securely screw the new element onto the back of the oven.
By following these steps, you can diagnose and potentially repair the issue with your electric oven not heating. Remember to prioritize safety and disconnect the power supply before conducting any repairs or testing. If you are uncertain or uncomfortable with the process, it is advisable to seek reliable oven repair services in Boston.


