The cost of everything is going up these days, and energy is no exception. Whether you’re sweltering in the summer heat or shivering in the winter chill, a ceiling fan can help you feel more comfortable. Set your fan motor to run your fan blades counterclockwise in the summer, so that they circulate cool air through the room and create a cooling breeze. Set your motor to run the fan blades clockwise in the winter so that they push warm air back down from the ceiling and keep your home cozier.
But comfort isn’t the only benefit a ceiling fan can bring to your home. Today’s modern ceiling fans come in a range of stylish designs that can really pull your home decor together. Use these tips to make your fan a conversation piece, not a blemish.
Hang a Flush-Mount Fan
Flush mount (also known as hugger or low-profile) ceiling fans don’t have a downrod. Instead, the base of the fan motor sits flush against the ceiling. These fans lend a sleek, streamlined look to your interior design, so if you’re updating the look of a room, you can’t go wrong with a trendy flush-mount ceiling fan.
Flush-mount fans are ideal for rooms with low ceilings, because you can hang them on a ceiling as low as eight feet high without risking hitting your head on the spinning blades. Many flush-mount fans use a remote control or wireless wall control, since dangling chains can get in the way in a room with low ceilings. Install a flush-mount fan in a room with recessed lighting for a look that increases airflow without being awkward.
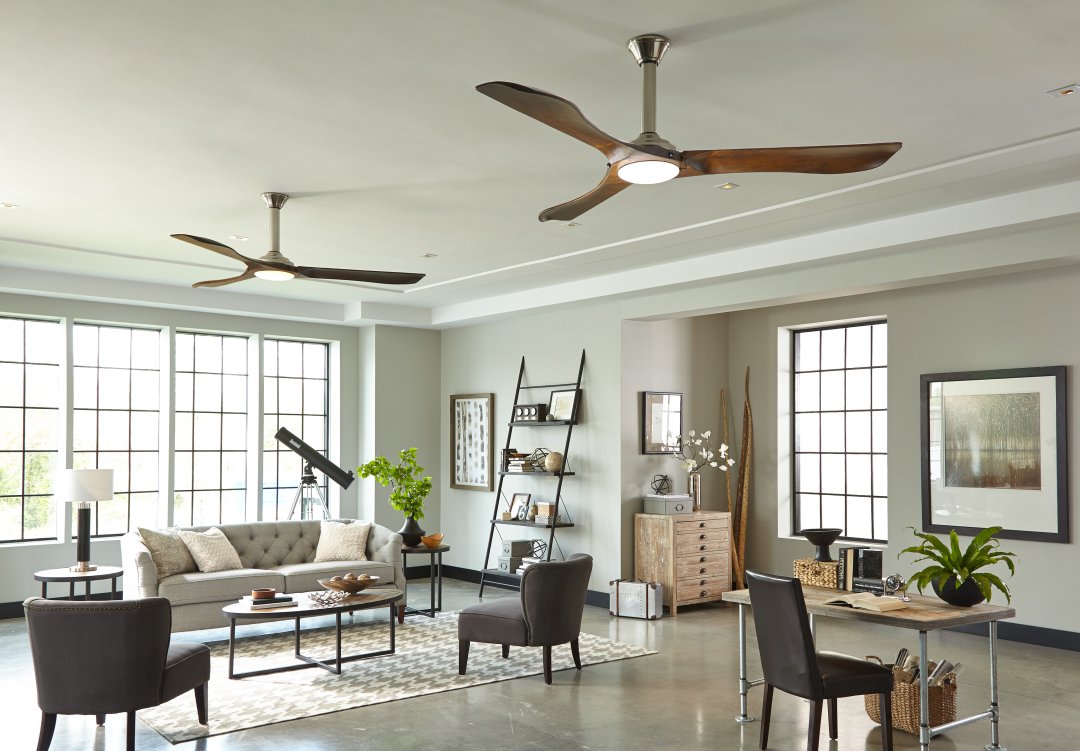
Go for a Clean, Modern Look
Traditional ceiling fan designs include four or five blades, but for a cleaner contemporary look, go for a design that has two or three blades. Clean lines and aerodynamic blades can tie together a contemporary decorating style. A fan with subtly curved blades can add softness and warmth to a sitting area or bedroom, while a two-blade fan is the ideal choice for an industrial loft space. Go for a white and chrome finish in an ultramodern space or wooden blades that match the dominate wood colors in the room.
Buy Something Unique
A ceiling fan doesn’t have to be something you hope your guests will overlook. It can be an accent piece. There are plenty of unique fan designs available on the market today, so you can choose a fan that draws the eye rather than repels it.
Consider, for example, a dual-motor fan with two fan heads that can be pointed in different directions for the ultimate in cooling and comfort. Shop for chandelier ceiling fans that can combine the best of a chic light fixture with the air cirrculation of a fan. Tie together your beach home with a palm leaf fan or your industrial loft space with a nine-blade fan. Your options aren’t really limitless, but they can sure feel that way.
Bring Some Charm to Your Outdoor Spaces
Ceiling fans are just as good at cooling outdoor spaces as they are at cooling indoor spaces, and a nice fan can really add some style to your outdoor gathering space. Just make sure you buy a fan rated for outdoor use. If you’re hanging the fan on a covered porch or patio where it might be exposed to moisture and humidity, but won’t be directly exposed to the elements, you might be able to get away with a damp-rated fan like the ones made for use in kitchens and bathrooms. However, a wet-rated fan, which is fully waterproofed against the elements, is your best bet. If you live in a coastal area, make sure you buy a marine-rated fan, because the salty sea air can quickly corrode the waterproofing and finishes on a standard wet-rated fan.
Match Your Decorating Style
With so many different styles of ceiling fans available, it’s hard not to find a fan that will fit in with your personal decorating style. Go for a more traditional design with four or five wooden blades and an ornate light fixture if your decor is more traditional. If you’re hanging the fan in a country cottage, look for something in white or go for a rustic palm leaf design. If you’re decorating your city apartment, a modern two- or three-blade design fits the bill. For a home office, perhaps something with a bright chrome finish or a subdued brushed nickel finish instead.
A ceiling fan can make a huge difference to your home climate control, and it can be a beautiful conversation piece as well. Choose the right fan for your space, and the only thing you’ll have to worry about will be getting too many compliments.
How to Swap Out Your Light Fixtures for Ceiling Fans
If you only have light fixtures in your home but no ceiling fans, you’re missing out. A ceiling fan is so much better than just a light fixture. It can help cool down your home in the summer and can make your room feel warmer in the winter (by pushing warm air back down from the ceiling).
It’s not even hard to swap out a light fixture for a ceiling fan. You already have all the wiring you need right there. It’s just a matter of taking down the old fixture and putting up the new one. Follow these steps to turn your boring old light fixtures into dynamic ceiling fans.
Turn Off the Circuit
Before you do any work at all on your home’s wiring, you should first always go to the breaker box and turn off power to the circuit you’ll be working on. Not sure which breaker controls which circuit? You can map your home’s electrical circuits using a circuit breaker finder. Once you’ve shut off the power at the breaker box, go to the room where you’ll be working and insert a voltage tester into one of the outlets to make sure the circuit is really dead.
Take Down the Old Light Fixture
Before you can install new ceiling fans with lights where your light fixtures were, you need to remove each light fixture. Take off the glass cover and unscrew the screws holding the fixture to the ceiling. You should be able to pull it down easily, exposing the wiring behind it. Remove the wire nuts from the connections and unroll the wire connections. Set the old light fixture aside. If it still works, you can donate it or use it in another room.
Install a Fan Brace and a Fan-Rated Electrical Box
Most light fixtures aren’t that heavy, so they don’t require a mounting brace or a heavy-duty electrical junction box. That’s not the case with ceiling fans, which can weigh upwards of 50 pounds or more. You’re going to need to make sure your ceiling fan is anchored to a joist or fan brace in the ceiling, and that you’re using a fan-rated electrical box that can hold up the weight of a fan.
If your light fixture was installed just below a joist, you’re in luck. You can buy a fan-rated pancake electrical junction box and anchor it directly to the joist. If your light fixture is in between joists, but very close to one, you might be able to simply move your fan over a little bit so you can anchor it to the joist – if you can do so and still keep it more-or-less centered in the ceiling. In that case, you can simply cut a new hole in your ceiling right below the joist, and attach a ceiling medallion to the ceiling above your fan to cover up the old light fixture hole.
If your light fixture is not right below or relatively close to a joist, you will need to install a fan brace. If you can get access to the ceiling joists from above, you can install a piece of two-by-four lumber between the joists, making sure to run it right above the hole. Anchor this piece of wood to the joist using 1.5-inch screws.
If you can’t access the joists from above, don’t panic. You’ll simply need to put in an expanding metal fan brace between the joists. You can insert it through the hole and expand it in the ceiling until the spikes on either end bite into the joists, anchoring it firmly in place. Attach your fan-rated electrical box to the expanding brace and pull the wiring down through it. Wrap the green or bare ground wire around the ground screw, but leave room for the ground wire to connect to the ground wire in your fan motor.
Put the Fan Motor Assembly Together
Your fan should come with instructions to help you assemble the fan motor on the floor. Unless you have a flush-mount fan, you will need to fasten a downrod to the motor housing and then put a canopy on the other end of the downrod. Pull the wiring from the motor housing through the downrod and canopy.
Attach the Fan Motor to the Ceiling Mounting Plate
With your fan motor assembled, it’s time to attach the ceiling mounting plate to the electrical box. There should be a hook on the mounting plate that will allow you to hang the fan motor up while you’re working on the wiring. If there isn’t, find someone and rope them into holding the fan motor up to the ceiling for you while you connect the wiring.
Connect the Fan Wiring to Your Home Wiring
There should be three wires coming out of your fan motor: a black one, a white one, and a green or bare one. These should correspond to a black, white, and green or bare wire coming out of your ceiling. If you don’t have all three types of wires in your ceiling, it’s time to consult an electrician.
Strip the ends of each wire to expose the bare metal, if it’s not exposed already. Then attach the black wire to the black wire, the white wire to the white wire, and the ground wire to the ground wire. Wrap the bare ends of the wire around one another and fasten them together with plastic wire nuts. Swing the fan motor up into place and anchor it to the mounting plate with the screws provided.
Put the Blades on the Fan
Now you can begin assembling the rest of the fan. Screw the blade brackets to the fan blades and then fasten them to the fan motor housing.
Hook Up the Fan Light Fixture
The light fixture that connects to your ceiling fan might plug into the fan motor, or you might have to wire it up the same way you did the fan motor. Follow the instructions that come with your fan. Then you can put in the bulbs and attach the bulb covers, and you’re ready to enjoy your new ceiling fan.


