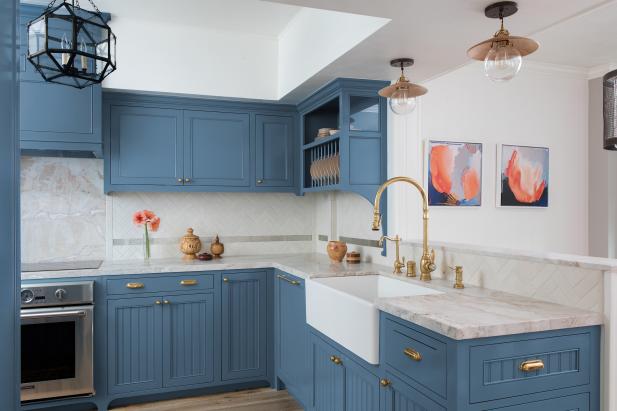
Installing cabinets may seem daunting at first, but with the appropriate tools and expertise, it can become simple.
Cabinet installation requires only basic tools, but knowledge of the subjects entailed below is tantamount to an excellent job – so make sure you read all the details below before hiring a professional to take care of the project.
Preparation
To start the project off right, clear out the area where the cabinets will go and establish a workspace to help facilitate material lying out without becoming disorganized as you work. Also, consider setting up a small table or bench specifically dedicated to tools – this way you will have enough room to comfortably transport and handle cabinet boxes as well as any additional items required in the installation process.
Locate wall studs using a stud finder, as seen here. Make sure the layout line is level, and mark vertical lines at each stud location on the wall to help properly shim and level the first cabinet before mounting any more cabinets – after installing this initial one will come much easier and simpler!
Step two should involve installing ledger boards or cleats (narrow pieces of wood that support frames and wall decor onto which cabinets can be secured. These cleats will prove particularly helpful if your layout lines extend above finished floors, providing support to keep them from shifting or pulling away from the wall over time.
Whenever possible, cabinets should be mounted directly to wall studs for the strongest and most secure installation possible. However, if this option is unavailable where needed, toggle bolts may provide an effective alternative; these special screws have washers integrated into their heads specifically designed to help securely mount to drywall surfaces.
Layout
At the cabinet layout phase, it is essential that all necessary materials are on hand. Be sure to have an appropriate drill, screws, nails, saws, and stud finder available as well as a level.
As soon as you have your entire materials ready, it is time to begin the layout process. Begin by sweeping and vacuuming the area to clear away any dirt that could prevent the proper installation of cabinets. Check that there are no cracks or other issues on walls that require immediate attention.
Begin by first installing the upper kitchen cabinets, which will enable you to avoid potential damage to lower cabinets or flooring. Locate and mark the high point of your ceiling where it meets with the floor as this can serve as a reference mark when installing them. Measure from this point out twenty-four inches on either side and compare this mark against your high point mark made earlier; choose whichever is higher as your reference point.
Once you have marked each point on your level line, locate and mark each stud in the wall at each of these points on your level line. Attach a straight one-by-three cleat directly below each of these locations so it will support upper cabinet boxes and secure them into their studs to provide support for upper cabinet boxes. Now dry-fit the upper cabinets starting with corner units in your kitchen; make sure all faces are even and use shims if necessary to fit them plumb against the walls.
Once your upper cabinetry has been dry-fitted and any necessary adjustments made, it is time to install them. Installation should preferably occur while the walls are still wet and before drywall has been installed as this will make installation simpler. Begin with corner cabinets before working your way around to complete all upper cabinetry in your kitchen.
Installation
Installing cabinets may seem daunting, but it does not need to be. With just some effort and common tools available at home, professional-looking results can be achieved without hiring outside help.
Install the base cabinets first by working from corners outward, using a level to form plumb lines with plumb bobs as you go. Before screwing them to the wall, place a shim at each corner to ensure sureness before placing screws into them and tightening them only loosely. Finally, make sure all cabinet boxes are flush against one another as well as with both floor and ceiling surfaces, then seat all mounting screws but do not tighten them too tight for safety’s sake.
Once the upper cabinets have been secured to their ledger board or cleats, you can begin installing them on the wall. A second person may come in handy at this stage as it can be challenging to reach over them while attaching them securely to both ledger board and studs.
If your cabinetry features crown molding, begin by marking where the crown should sit on your layout line. Use a carpenter’s level to ensure the wall is perfectly straight before mitering its outside corners, mitering them with miter miters at inside corners coping the ends miters as you install. Any gaps should be filled using wood putty or matching caulk color.
Finishing
Cabinet installation can be an arduous and time-consuming task, requiring hours to mark studs, strike cabinet lines on walls and mark high points in either floors or ceilings, place outlets correctly, remove any trim that blocks their view, as well as ensure electrical outlet placement is correct and remove any trim that will hinder new cabinet placement. To expedite and ensure perfect results for this task, drywall, and painting should already have been completed before beginning this task.
If the kitchen where you are installing cabinets has yet to be dry-walled, framing and hanging it as soon as possible is highly recommended. Contact the professionals at Arizona Interior Cabinets to do so, as it is intensive and confusing for novices. Not only will this make installing cabinets much simpler, but framed and hanging drywall will protect it from temperature changes which may cause it to warp or sag over time.
If the upper cabinets feature openings for electrical outlets, cut a hole in each cabinet according to its dimensions and make sure not to drill into plumbing lines or HVAC ducting located behind walls. If unsure where these items are located, hire an experienced plumber or contractor as help locating them may be required. Also, remember that cutting exact size holes is more challenging than it seems so be generous when taking measurements to allow room for future modifications and changes.


